Import Wizard
The Import Wizard is the process that you follow in order to complete an Import and save a Data Exchange Profile (so that you can run the same Import again in the future).
The Import Wizard will guide you through five steps in order to complete an Import:
-
Select File: Select your source data file to import and the corresponding Module and Category to load the data into
-
Load Profile: Allows you to Load an existing Profile with all subsequent Import steps already configured
-
Table Mapping: Maps
-
Column Mapping: Maps columns in the source data file to data contained within Brightly Assetic
-
Import Summary: Gives a summary of the Job and allows you to save a Profile of the Import so that you easily run the import again in the future
Step 1 - Select File
You will see the following screen when you select the "Import Wizard" from the secondary menu:
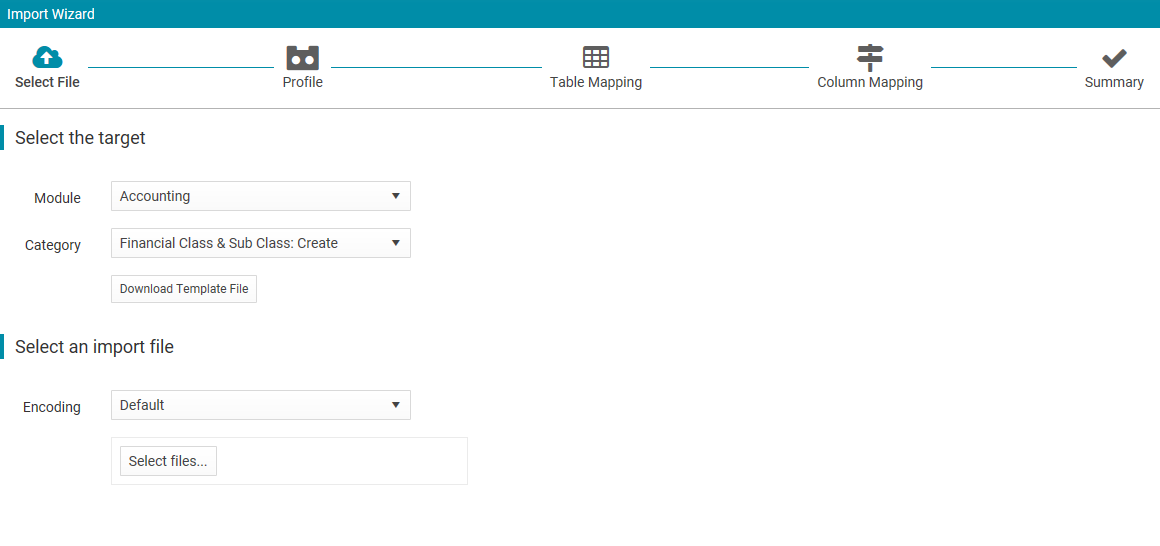
You will need to first select the "Module" and the target "Category". These values reflect where in the system the data is going to be imported. Information on available data import areas is detailed on the Import Modules and Categories page.
You also need to select a file for the Data Import to be run with. This will typically be a new file if you're running the import for the first time, or it will be a file that has been corrected of errors once job has finished running (accessed via the "Import History" page).
The supported data import file formats include:
-
GIS Data - GeoJSON / KML
-
Other Data - CSV
Click "Next" to proceed.
Step 2 - Create / Load Profile
You should now select whether you want to create a "New Profile" (default selection), or load a Profile that you have already created by selecting "Existing Profile" and choosing a profile from the list.
Click "Next" to proceed.

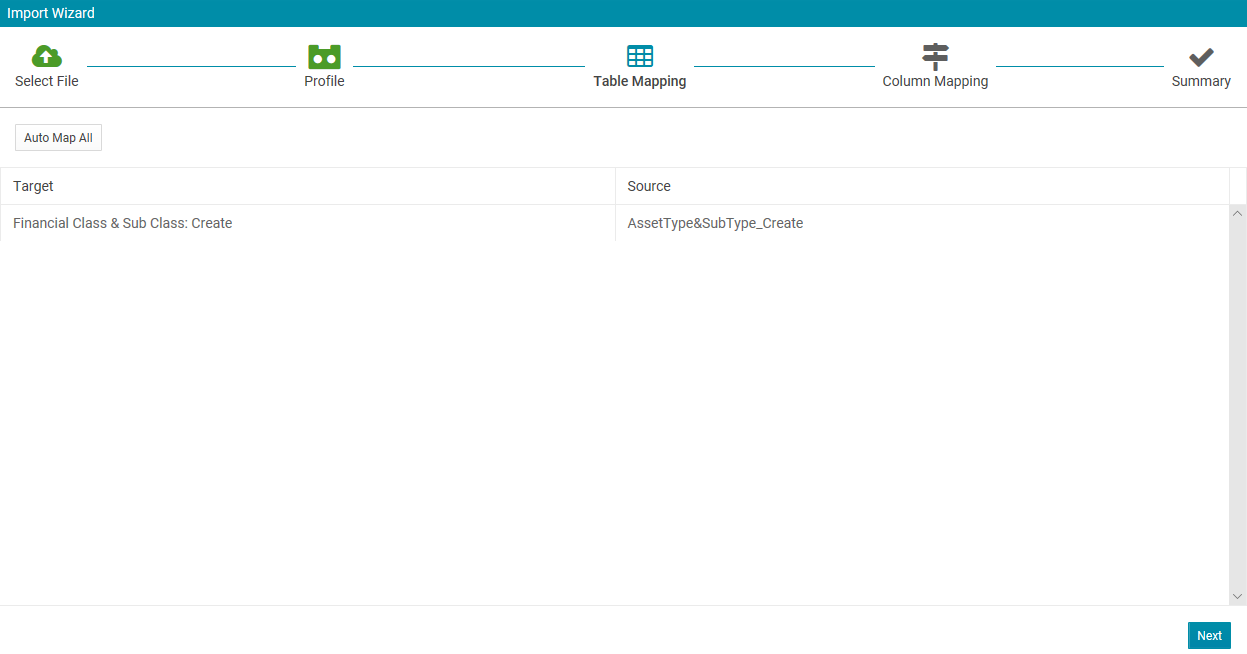
Step 3 - Table Mapping
In this section you are required to map the uploaded file (source) with the target area of the database. When this is completed select.
Click "Next" to proceed.
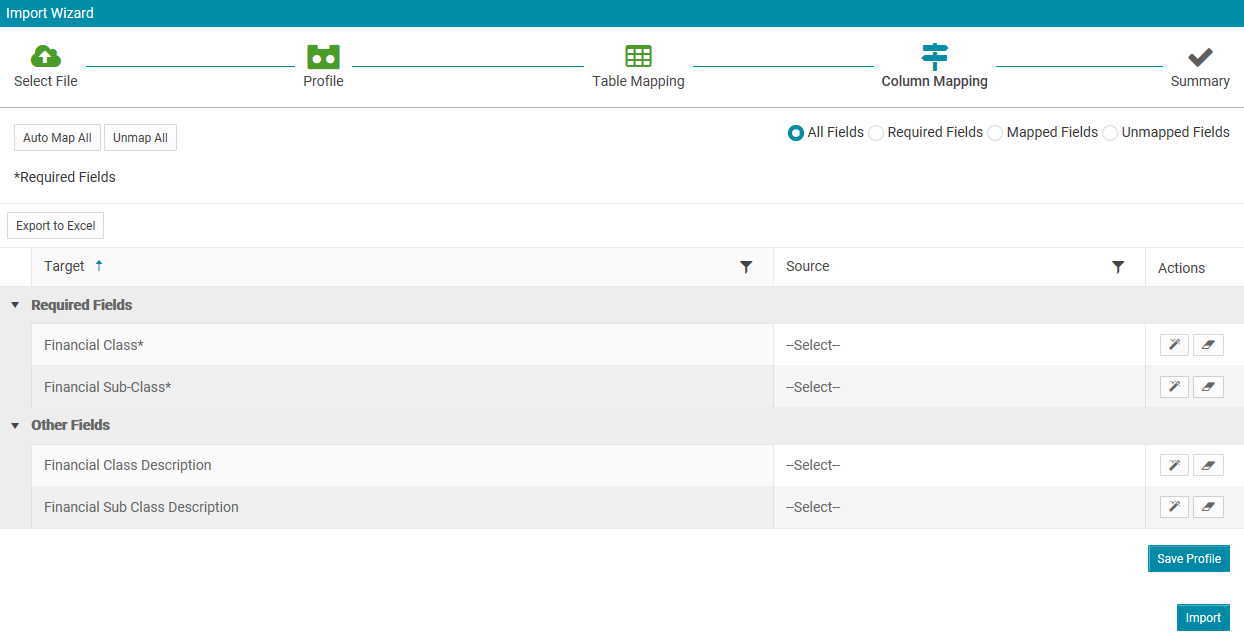
Step 4 - Column Mapping
The "Auto Map All" setting means that all column headings in the source file that have the same name as an Assetic field will be automatically mapped for you.
For column headings in the source data file that don't have the same name as an Assetic field, you can manually map the Source field to an Assetic field. This approach is useful when migrating / integrating data from external systems.
Once you have mapped all required columns to import, you can optionally click "Save Profile", which will allow you to reuse this profile in Step 2 in the future.
Click "Next" to proceed.
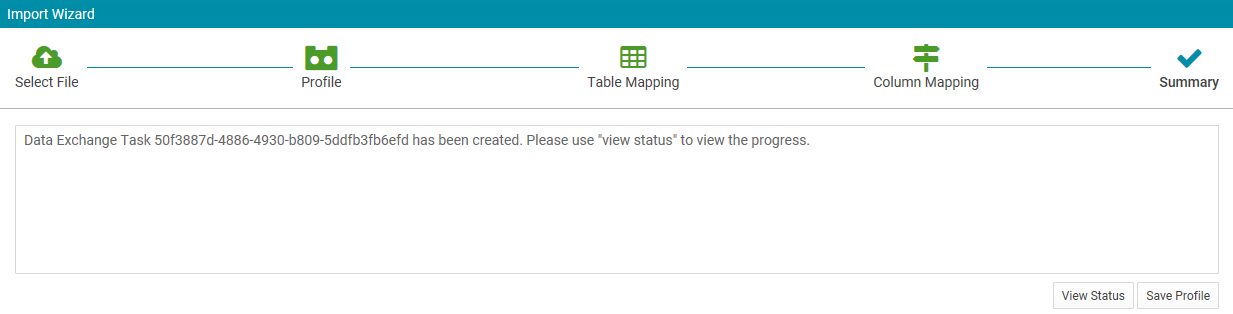
Step 5 - Import Summary
The import will now commence and you will see a summary of the job.
You can click "Save Profile" if you want to use this Data Exchange profile in the future.
You can click "View Status" to see the progress on the job (also accessible via "Import History" in the secondary navigation menu).